
THE LENS EVERY CREATOR SHOULD HAVE
You can have the cheapest Canon DSLR camera you can buy and if you a great lens, you can still get AMAZING photos.
Recently I was helping someone purchase a new camera for a beginner and I suggested the new Canon EOX Rebel SL2. This camera is packed with great features like the same 24mp sensor my camera has, legendary Dual Pixel Auto Focus, and a small footprint...
You can have the cheapest Canon DSLR camera you can buy and if you a great lens, you can still get AMAZING photos.
Recently I was helping someone purchase a new camera for a beginner and I suggested the new Canon EOX Rebel SL2. This camera is packed with great features like the same 24mp sensor my camera has, legendary Dual Pixel Auto Focus, and a small footprint... for about $500.
Even with an entry level camera you can take amazing photos. The big difference is what lens you are working with. If you buy a camera with the typical 18-55mm, you can expect to get good quality photos, but you have to work hard to achieve outstanding creative photos.
Instead of buying a kit with a lens, I suggested buying just the camera body and buying 1 lens.
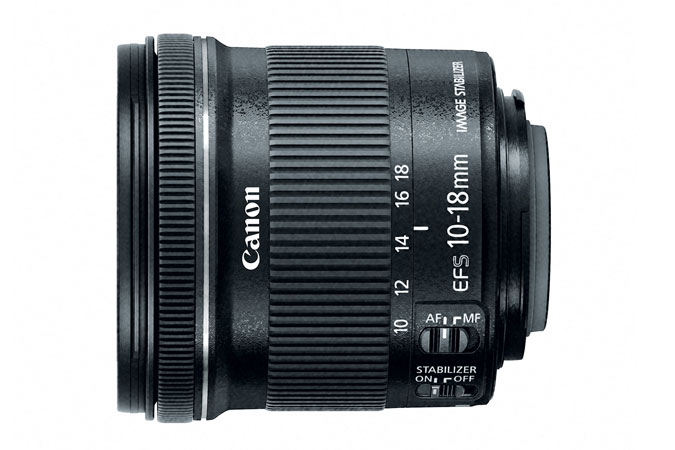
Introducing... the Canon EF 50mm f/1.8 STM.

What? A prime (a lens that doesn't zoom) lens?? One focal length? how limiting... Although I do agree with the fact that a prime lens limits you, there are several reasons I would suggest this 50mm lens (also known as the nifty fifty) over buying a kit.
NOTE: the ONLY reason I would buy a kit with an 18-55mm is if it was the same price or cheaper than just a body.
Here's a few reasons why I would suggest this over ANY kit lens
Price
You can pick this lens up for around $125 new or less than $100 refurbished (I always suggest refurbished). That's such a deal for any lens, let alone a quality lens like this one!
Another advantage of this lens' price is you won't be afraid to use it. This lens is mostly plastic, but that keeps the weight down. One of my lenses is over 3 lbs, and if you are carrying that around all day, you will feel the weight of your camera setup. With this 50mm, its light, small and easily replaceable if something were to happen to it.
Focal length
Although this is a prime, I don't think that's a bad thing. When I first started using my kit lens when I was zooming in and zooming out, having no idea what I was really doing. I was playing with my shutter speed and my aperture... When you start with a prime, it takes one of the equations out of the puzzle. You can only shoot at 50mm. This helps the beginner get used to their digital camera with one less setting to get confused.
If you've had your camera for awhile, maybe with either the 18-55 or 18-135 kit lens and your ready to step up your photography, this lens should be your first prime lens. 50mm is a great size, especially on a full frame. On a crop sensor it's a little tight, but what I love about 50 is it makes you think through your composition. How can you get everything you want in your frame without zooming in or zooming out? Zoom with your feet! Because you only have one focal length, you will start thinking through your shot more because you can't easily jump from 18-55... or 135 so easily.
50mm is a great focal length as far as depth perception as well. If you aren't aware, focal lengths effect your photos two different ways. Obviously they zoom in, the bigger the focal length, the more it zooms in. The second thing it does is change the depth perception. If you have a small focal length (18mm), a 15 foot pier will look much, much longer than 15 feet. 50mm is a great balance and has close to the same view as our eyes (typically in between 35-50mm).
Aperture
Seriously? f1.8 for a hundred bucks?? Incredible! Aperture has two different effects on photographs. First, as you lower aperture it lets more light into the camera. This is a big help for low light situations. This helps keep your ISO down, helping you have the best quality photo you can have. The second thing aperture does is adjusts your depth of field. At a high aperture or F stop (like f18), your focus plane is essentially the entire photograph. As you lower the aperture, your focus plane narrows, helping create depth of field (blurry background). F1.8 is extremely low! It's so low you have to be careful your subject is entirely in focus. If your subject leans forward slightly, they will be out of focus. BUT, thats how you create incredible blurry backgrounds. This can take your photos from amateur looking to breath taking!
Canon EF 50mm f/1.8 STM
Your gear doesn't make you a creative, but choosing the right gear for the right situation will make it much easier to help create the best content you can. I highly suggest every photographer have this lightweight, inexpensive lens in their kit!
Here's two More entry level lenS!


How to: Get Better...
The past few months have been a whirlwind for my creative skill. There's no doubt I've taken HUGE steps in creative growth recently. I have noticed there's been a huge difference in the quality of photos and videos I've been creating lately. How exciting! But how have I gotten so much better?...
The past few months have been a whirlwind for my creative skill. There's no doubt I've taken HUGE steps in creative growth recently. I have noticed there's been a huge difference in the quality of photos and videos I've been creating. How exciting! But how have I gotten so much better? One could say I'm just a talented person, one could say I've just gotten a lucky shot... The truth is, there are specific reasons why I have grown creatively lately. Although you can grow by accident, I've found if you apply these 3 things in your life, you will see exponential growth, faster than you have ever seen before. Let me share them with you!

Get More Experience
by doing more...
This is kind of a no brainer... If you want to take better photographs, you have to take more photographs. If you want to get better at guitar... you have to play more guitar. If you want to write better, you have to write more words. There are times in my life when I just feel bored with creativity. In those moments it's most important for me to get out my camera and take pictures. There are times when I feel like I am stuck playing the same few chords. In those moments I need to play more guitar. When we get bored with what we are doing, but still force ourselves to keep going, we find new ways to "do." You'll learn new chords, you'll find new angles, you'll work with new words. If, once you get bored, you stop creating two things happen. One: your axe gets dull and you have to work harder (or resharpen it). and Two: you have robbed yourself of an opportunity to learn something new, therefore, putting yourself further back than what you were before you set your axe down. Bottom line: force yourself to keep going when it gets boring. I guarantee you, you will be happy with the results.

Surround Yourself
with people who are more talented than you
Surround yourself with people who are more talented than yourself
In the beginning of 2017, I was in a situation where I set creative bar. It was up to me to come up with new ideas and push the envelope when it came to creativity. I felt I was making strides in my own personal creativity and was happy with the results I was seeing. Here we are at the end of 2017 and I am in a completely different situation surrounded with people who are way more talented than myself. I work in a church on a team with several members who are stuffed with talent. I personally have never been in this situation. I have always been part of small organizations and I was the driving force of my own creativity. Now, I work with a large specialized team, and also have experience outside of the church working next to filmmakers who have an unbelievable amount of talent. This has pushed me in two different ways:
1. I am learning like crazy from them. Obviously, just working next to others you gain insight by the way they accomplish things. Simple things like how they organize their workflow all the way to particular ways to do certain specific tasks. Every day I am learning new skills from them, making me raise my bar.
2. Because I am surrounded with people more talented than myself, I have noticed I am subconsciously forcing myself to produce better content. It's a weird experience for me to think of myself not as talented as those around me. Although I have been in rooms filled with people smarter than me before, I have never felt the urge to push myself to my own personal limits. I think I have said I was but it just wasn't the truth. I think the difference now is I have some how surrounded myself with people who are very likeminded and I want to be able to make sure I am pulling my own weight. In doing this, I have noticed my content has taken a jump in quality without formally learning new information. This doesn't only apply to my content at work, but all of my creative content has taken a bump in quality.
It's pretty crazy the power others can have in our lives. I have never felt belittled around these talented people I get to spend time with, if anything I feel they give me more credit than I deserve, but I still push myself to strive farther than I ever have. Although it is completely up to yourself to see personal growth, if you can find a few people who are near the same skill level or slightly higher in your field to spend time with and "talk shop," I promise you will see higher quality in your content.

Find something
you can't do, and do it!
This is a big one. And a simple one. Simply look at someone else's work and say "how did they do that?" Figure it out, and do it! There's plenty of times when I am watching a Youtube Vlogger or tutorial and wonder just how they "did that" and I will then research how to do a certain effect, or get a certain shot, or find a certain angle. By doing this I now have that skill in my toolbox I can store away for the perfect moment. When the time is right, I will remember copying the idea and then add elements of the idea to my creative content. It's a simple process but before you can add that skill into your toolbox, you need to spend time replicating someone else's process so you can make it your own. Try it out. Find a piece of music you couldn't already play and replicate it. Watch for a commercial where you wonder how did they make that motion graphic, and research it until you can do it. Actually do it. Get in After Effects and spend the hour on that 2 second motion graphic. You can do it. Figure it out! Don't let your limitations limit your creativity. Just get it done.

A Few Extra Tips
Here's a few extra things I've learned over the past few months.
TV IS A TIMESUCK - I've realized that you can sit in front o f a tv and lose 5 hours of your life without even trying. As much as you think it's a way for you to unwind, you are really just wasting your life. Find a new way to unwind: read a book, listen to a new album, spend time with your family, spend time with yourself, read your Bible, organize something, build something, get some rest, go to sleep. Seriously, this is coming from someone who makes videos for a living. Don't get sucked into sitting in front of a screen for several hours at a time, wasting your life. Your time is worth more than that to you.
TAKE NOTES ON WHAT THE WORLD IS SHOWING YOU - I am always trying to find new ways to look at life. If you see a photograph you like, note it. If you see a graphic that catches your eye, note it. If you hear a piece of music you like, note it. Make sure you are paying attention to the creation around you. You'll be surprised just how inspired you can be from what is happening around you!
GEAR WILL NOT MAKE YOU BETTER - As much as I LOVE new gear, it will not improve my game. In fact, I think it may be a hinderance to growth. Hear me out: when I get new gear I get distracted by the shiny new buttons and forget about the skill. Most of the time when I get a new lens, I actually see a drop in quality in my photos for awhile because I'm more focused on the new toy than I am with the skill of taking photos. Also, whenever you add a new piece of gear to your tool belt, it takes a period of time for you to get acquainted with how the piece of equipment can be used in your process. Now, that being said... new gear is essential for growth. The better your gear, the easier it is for you to create quality content. BUT don't let the gear blind you of the creative process of your craft. Example. I recently started working at a new job with lots of new toys I had never played with before. It's taken me months to get acquainted with the equipment. I finally am just starting to get to the point where I am able to subconsciously make the adjustments I need to make in the real world situations. As time goes on, I am more comfortable with the equipment and can use the gear to help me tell the story better. Bottom line, don't go buy something new and expect to see a huge improvement. Instead, use what you have and make people wonder how you got such quality content out of such subpar equipment.
MAKE SURE YOU ARE CONSTANTLY POURING INTO YOURSELF - This is a common theme for me. If I stop learning, I stop growing. Make sure you have a constant intake of fresh information. There's several ways how I accomplish this. Youtube is one of them (not pointless youtube of bears juggling bunnies, But those are fun too...) Find people on Youtube who can help you improve. Make sure you are reading. Make sure you are getting plenty of rest. I have several ideas come to me because I am well rested.
At the end of the day, the only person who can help you get better is yourself so get at it!
If you haven't read the book "Oh, the places you'll go!" by Dr. Suess lately, you should. Seriously.
“And will you succeed?
Yes! You will, indeed!
(98 and 3/4 percent guaranteed.)
KID, YOU’LL MOVE MOUNTAINS!
So...
be your name Buxbaum or Bixby or Bray
or Mordecai Ali Van Allen O’Shea,
You’re off the Great Places!
Today is your day!
Your mountain is waiting.
So...get on your way!”

The rule of thirds
Rules are made to be broken? Sometimes. But... Rules are made for a reason. If you break this rule, chances are a car won't crash into you at an intersection or a wall won't fall down after you are completed with your remodel. The rule of thirds is a simple tool to...
Rules are made to be broken? Sometimes. But... Rules are made for a reason. If you break this rule, chances are a car won't crash into you at an intersection or a wall won't fall down after you are completed with your remodel. The rule of thirds is a simple tool to help you in your creative composition. When you are laying out your creative element, whether it be shooting a video, creating a graphic, or taking a photograph, think through where you want your audience's attention to fall. The rule of thirds suggests dividing your canvas into 9 equal spaces and placing your subject at the point or on the line of these divisions. Essentially cut your canvas into thirds and use those lines to be your guide on where your subject should be. When this rule is followed, it is claimed your art has more tension, energy, dynamics and interest. For the most part I agree. I don't shoot every photograph following this rule, but I do think of every photograph through the lens of rule of thirds. Let me explain.
The rule of thirds dates back over 200 years ago and has been a major part of photography ever since. Although there is skepticism and debate, it's a rule you can see in several photographs and movies from creatives all over the world.
Setting up for the rule of thirds
When I first started learning how to shoot videos and DSLR photography, a common theme of the rule of thirds continued to appear in my training. I started noticing others were using the rule, when before I thought it was just random placement. Sometimes rules can feel confining and claustrophobic but when you learn the freedom within a rule, it actually helps you structure your creative playbook so that all of your finished products do not look the same.
There are several ways you set yourself up for using the rule of thirds. Many cameras today actually have built in grids you can use while you are shooting, whether looking through the viewfinder or using a screen. I have this set on my Canon 80D both in the viewfinder and live view screen for photos and video. You can even turn on a grid on your iPhone!
Canon 80D Viewfinder
iPhone camera app
80D live view screen
Typically most photo editing software includes grids in the "Crop" section. If you have ever noticed these lines, now you know why there are there! I use Lightroom to edit most of my professional photographs and love this simple feature in the cropping overlay. There are times when I may not shoot exactly level and when I go in to realign, I can use these grids to both level and crop.
Using the rule of thirds
There's several ways to use the rule of thirds. Here's a few ways I use it:
ALIGN THE HORIZON
Line up your horizon of your landscape photo with either the top or bottom horizontal line of the grid, depending on what you want your audience to focus on. If the sky is the focus, align the horizon with the bottom horizontal line. It helps you give enough context to see where the photo has been taken, but also, puts emphasis on the sky. If the sky isn't the emphasis, put the horizon at the top line.
ALIGN THE EYE
It's beneficial to emphasize your subject, specifically a person, from the background using rule of thirds by aligning the subject on one of the vertical lines. Generally, I try and get the subjects eye closest to the camera on one of the intersections of the thirds lines (see example below). You have four spots where the lines intersect so get creative with where your subject is placed on the grid, mixed with the background. Once again, This adds dynamics and helps the subject stand out from the background. If the subject is not a person or animal, place the subject on the line where you see fit.
Dont forget, you can use the rule of thirds in portrait mode as well. The example shows the body of the subject aligned with the frame right on the right vertical third line. It may be slightly more tricky, but it adds a new dimension to your artwork.
BREAKING THE RULE
There are several times when I do choose to break the rule BUT I always view the frame through the rule of thirds to see if it would help the composition. Once I rule it out, then I will either bend the rule or break the rule completely. Maybe you want more sky in the frame. Try 1/4ths instead of 1/3rds. Or 1/5ths. You still align your composition to the lines, you just move them slightly in the frame.
Another option is to just throw the whole idea out of the window. Usually this happens with symmetrical photographs, or when I use lines of the subject, or sometimes, you just want to make your own line.
At the end of the day, you are the artist. You get to choose how you want to compose your art. Rules are here to help us stay on track so I encourage you to embrace the rule of thirds when you can. It will make you a better artist. Once you learn the power of the rule of thirds, you will know how to break it.
What other rules have you heard of in the creative world?

Graphic Design 101
Social media has changed the way we do life. If we want to share a thought or idea on our favorite social media site, boring words no longer are attractive. Facebook has started letting you create images with text on them to emphasize your point...
Social media has changed the way we do life. If we want to share a thought or idea on our favorite social media site, boring words no longer are attractive. Facebook has started letting you create images with text on them to emphasize your point. YouVersion Bible app lets you make images inside the app of verses you love. Instagram now lets you write on top of the picture you just took. This is essentially graphic design.
“Graphic Design /ˈɡrafik dəˈzīn,dēˈzīn/
the art or skill of combining text and pictures in advertisements, magazines, or books.
”
Working in the church, I have always had to make graphics. It is something I love and enjoy doing. There's something fulfilling when I create a great graphic blending text, font and images to display the theme or thought to it's next level. In a sense you are being a visual storyteller. In all honesty, it isn't very hard to make good looking graphics as long as you have a decent eye and you pay attention to a few guidelines. I thought I'd share a few things I've learned over the years working with high productivity apps like Photoshop and Illustrator. NOTE: most of these tips will be geared toward creating graphics for churches or social media promotions. Obviously, if you are creating a folding 3 page brochure, hopefully you have tackled some of these easy ideas already, or maybe they will be a good reminder for you.
In the world we live in today, most people do not need professional apps like Photoshop to make a graphic to share on the web. There's tons of choices of fun apps that give you everything but the text. Some apps you have to pay for each graphic, some you don't. Font Candy is a great example. Another great example is ReType (one of my favorites). Canva is another popular app. All you have to do is type in your message and it generates backgrounds or pictures and arranges the font in a fun order. If you already have an idea of a graphic you want to make, I suggest you use Keynote on your IOS device or Mac. Keynote is a very powerful app when it comes to graphic design. Design a slide and export it as an image and you are good to go.
Now, on to the main core elements of graphic design:
Step 1: The concept
Everything inside your graphic says something. Whether it's a person, or a color, it's all saying something. The first step to designing a graphic is to think through exactly what you want to say in your graphic. What mood do you want it to have? What is the main idea of the graphic? What are you trying to accomplish? Who is your audience? What is the call to action?
A few tips on the concept:
1. Focus on what you want the viewer to do (ex. go to my website). If the image is just for creative enjoyment, what do you want the viewer to feel? (ex. wow, thats a beautiful verse).
2. Dial in either your style. Everything in your graphic describes your style. Think through every aspect and what it style it is depicting. (crayon fonts are childish, etc). Even if you like them, certain aspects of your graphics will not work with your concept. Always keep your concept in your mind while working through the graphic.
3. If you are making a graphic for your church, remember your church's branding (digital identity). What are their colors? Will your concept match their logo?
Step 2: The Background
Once you have your concept, I almost always start with the background. Take a photo, select an image, or create a color/texture that will help portray your concept.
A few tips on backgrounds:
1. Empty space is a big part of creating a clean looking graphic. Don't select a cluttered image
2. A small trick to hiding your background is to add a black box over the entire image and lower the opacity until the text stands out (see "What's your story" example above).
3. If the background doesn't connect to the main concept, it's time for a new background
4. Simplicity is very popular right now.
5. Gradients are HUGE in 2017. Look at your phone, so many of your app icons are gradients (Instagram, Vimeo, All of the Apple apps, Nest, Facebook). Here's a cool website that helps you pick out good looking gradients.
6. Remember the moods of color.
Step 3: The Text
The font you use is almost as important as the text itself. Fonts can date a graphic faster than anything. When you are thinking of which font you want to use, make sure it matches everything else in your concept.
A few tips on Text and font:
1. If you haven't already, do some research on font classifications. It will help you understand what emotion a font describes.
2. Only use 2 types of fonts in your graphic (besides your logo). Typically I'll find a thick font and a thin font to accent. Usually you can find a second font in the same family.
3. Use size to emphasize your point. This will add dynamics to your image.
4. Look at other images and logos to see what fonts are popular right now. Try and recreate a look of another image to expand your experience and bag of tricks.
5. Find a font you love and use it instead of trying to find a new font every time.
6. Never ever stretch a font. gross. Change the size if you are trying to match it up.
Step 4: Arrangement
This is where your graphic all comes together. Once you have your background and font/text, take time and layout your image.
A few tips on Arrangement:
1. If you haven't heard of the rule of thirds, this is a must. Use this in both your background and your text.
2. The biggest problem with most graphics is space. If you think your graphic is too crowded, figure out what doesn't need to be in the in the graphic.
3. Let it set. Create the final product, and then come back to it in 24 hours. You'll see what you don't like. If you don't have the time, ask someone else or compare it next to another graphic.
Obviously, there is much more to graphic design, but these will help you get started on making great graphics. The key is experience. Start with what you know and improve by replicating what you see. Take a picture of a good looking graphic at Starbucks and try and replicate it when you get home with your concept. Here's a link to some of the other graphics I've made. If you ever have a question of how I created something, feel free to ask!
What are some of your favorite design tips?

Limitations
"It's raining," "We don't have that kind of money for a stage display," "I only have a iPhone camera..."
There will always be limitations. Whether we are part of an organization or just trying to get through the day, we constantly can find roadblocks ready to stop us in our creativity. I am currently reading a great...
"It's raining,"
"We don't have that kind of money for a stage display,"
"I only have a iPhone camera..."
There will always be limitations. Whether we are part of an organization or just trying to get through the day, we constantly can find roadblocks ready to stop us in our creativity. I am currently reading a great book "Created for more: 30 days to seeing your world in a new way" by Jonathan Malm. Every chapter has a theme to "help awaken the spiritual act of creativity within [us]." His main point in the second chapter: limitations force creative solutions. The second I read that it hit me. This has been true my entire creative life! AND typically when I run into a limitation, I have the freedom to be more creative! After spending some time with this idea, I thought I would share some major limitations I have come across and how we can overcome them.

Resources
Ah, Resources. Gear, Money, Budgets. "If only I had..." story of my life. No matter what creative channel I am working in, this limitation ALWAYS comes up. When I first started getting into electric guitar, I became obsessed with new pedals! I thought if I would only have "___" pedal, I could have an amazing sound. It got to the point where I had such a huge pedal board I could hardly carry it. I ended up downsizing and keeping what I really needed.
The best way to battle the limitation of not having the resources you need is to maximize the resources you have. If you have a budget you get to work with at your church, figure out how to stretch that budget into ways you never thought possible. Don't forget you can look around and, if possible, sell some of the resources you haven't used in years. I think this is being a good steward with what you have.
Another way to maximize your resources is to push their limits to the max. Going back to when I started building my pedal board, I actually was using an iPad to drive many of the pedals I needed. I built a bluetooth unit with pedals to send cues to my iPad so it was if I had the pedals on my pedalboard, but used all of the horsepower from the iPad to drive the sounds I needed. I was able to have an amazing amount of sound at my fingertips for the fraction of the cost if I were to buy all of the pedals individually. Eventually I was able to save up and purchase specific pedals for specific needs, but this was a great way to get me started without having to purchase several hundred dollars worth of pedals and use what I already had.
Another example of this is to use everyday items to fill the gap. Example: when we first started getting into video at Evident Church, we didn't have all the money upfront to dump into fancy equipment. If you know anything about video, there are several key components that are mandatory. One - a good camera, two - great sounding audio, three - lighting, lighting lighting! Obviously I wasn't able to purchase top of the line gear right away so we worked with what we had. I purchased a consumer DSLR camera with a kit lens, used an audio interface with an old mic we had laying around, and used some ikea lights we used for ambient lighting in our Headquarters. Believe it or not, we were able to create some pretty incredible videos without purchasing very much.
If you can perform at a professional level with amateur gear, just think what will happen when you have professional gear to work with! Every time I purchased a new pedal I tried to push that specific pedal to it's maximum potential. Every time I ran into a roadblock where I needed a new piece of equipment, I first used what I had. Maximize the resources you have available at your fingertips to jump over this limitation.
People
It's easy to get hung up on not having the people you need. I was just recently at a large church talking with the worship team and they said they didn't have the musicians they need so they bring in someone outside the church. People can absolutely be a limitation. So what do we do?
If we want to overcome the limitation of not having the people we need, use the people you have! I don't mean run the same few people you have into the ground. Look around at your people and think about who you can invest in.
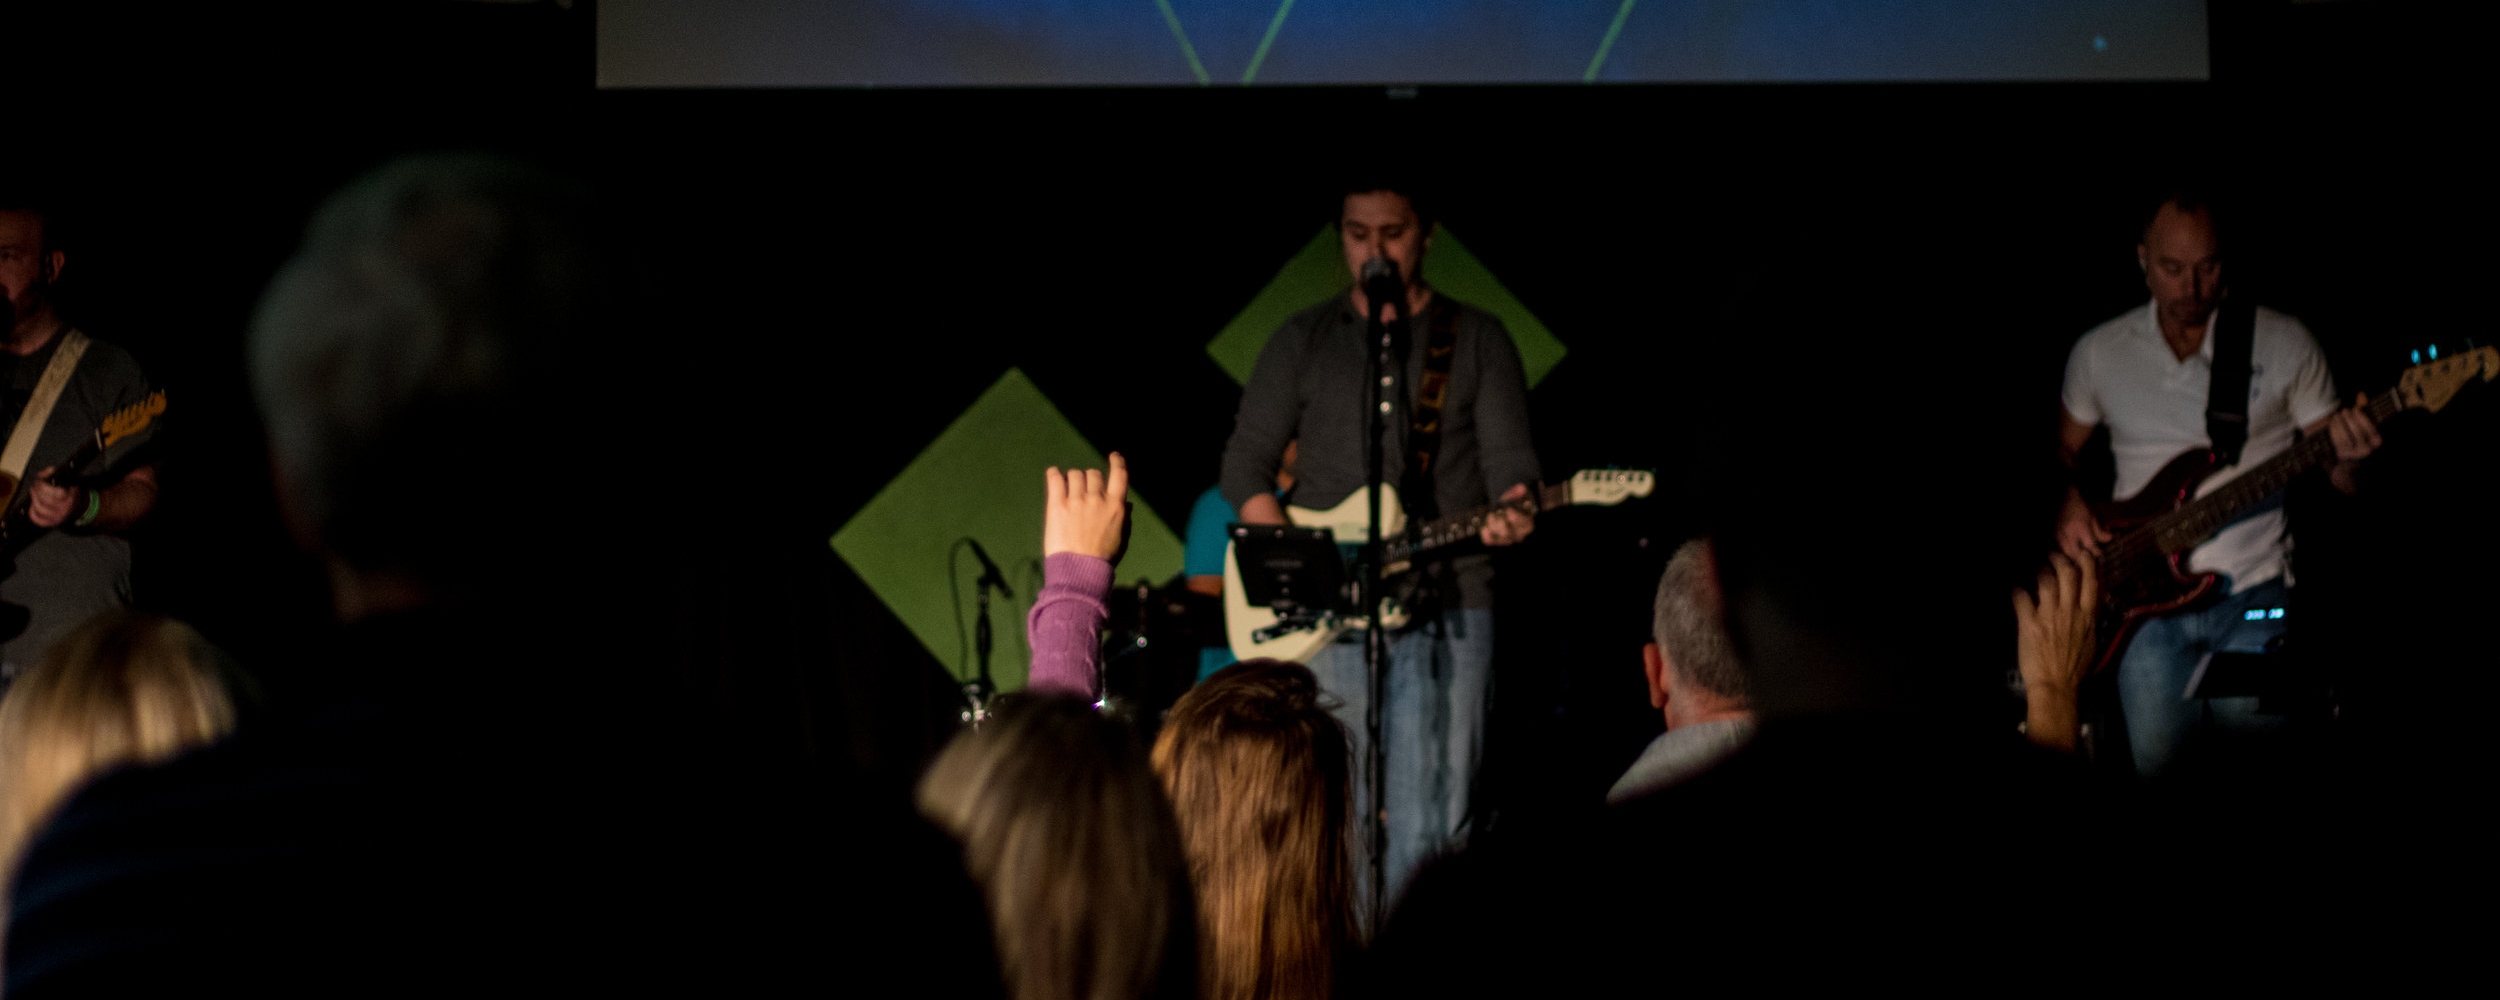
When I started at Evident, the worship ministry was small.... like 3 people. That's too small. The same few people were playing every weekend and it still wasn't enough. The first thing we had to do was lower our standard of excellence. That doesn't mean we sacrifice quality for quantity, it just means we have to look at what is most important. For me, having more people involved in a worship ministry is more important than creating a rockstar band that never hits a wrong note.

As I started to get to know the people at Evident, I would hear of people who may have had some musical experience in their past. I would first start to build a friendship with them, then help them develop their skill, and then add them to the team! Within just a few short months our 3 people turned into about 10-12. On Christmas Eve we had a full stage of musicians!
No matter what your situation is, there are people you know you can develop and train. Don't look for the same people who do everything, try and find someone who is ready to get involved, and has potential. They are out there, waiting for their shoulder to be tapped.

Knowledge
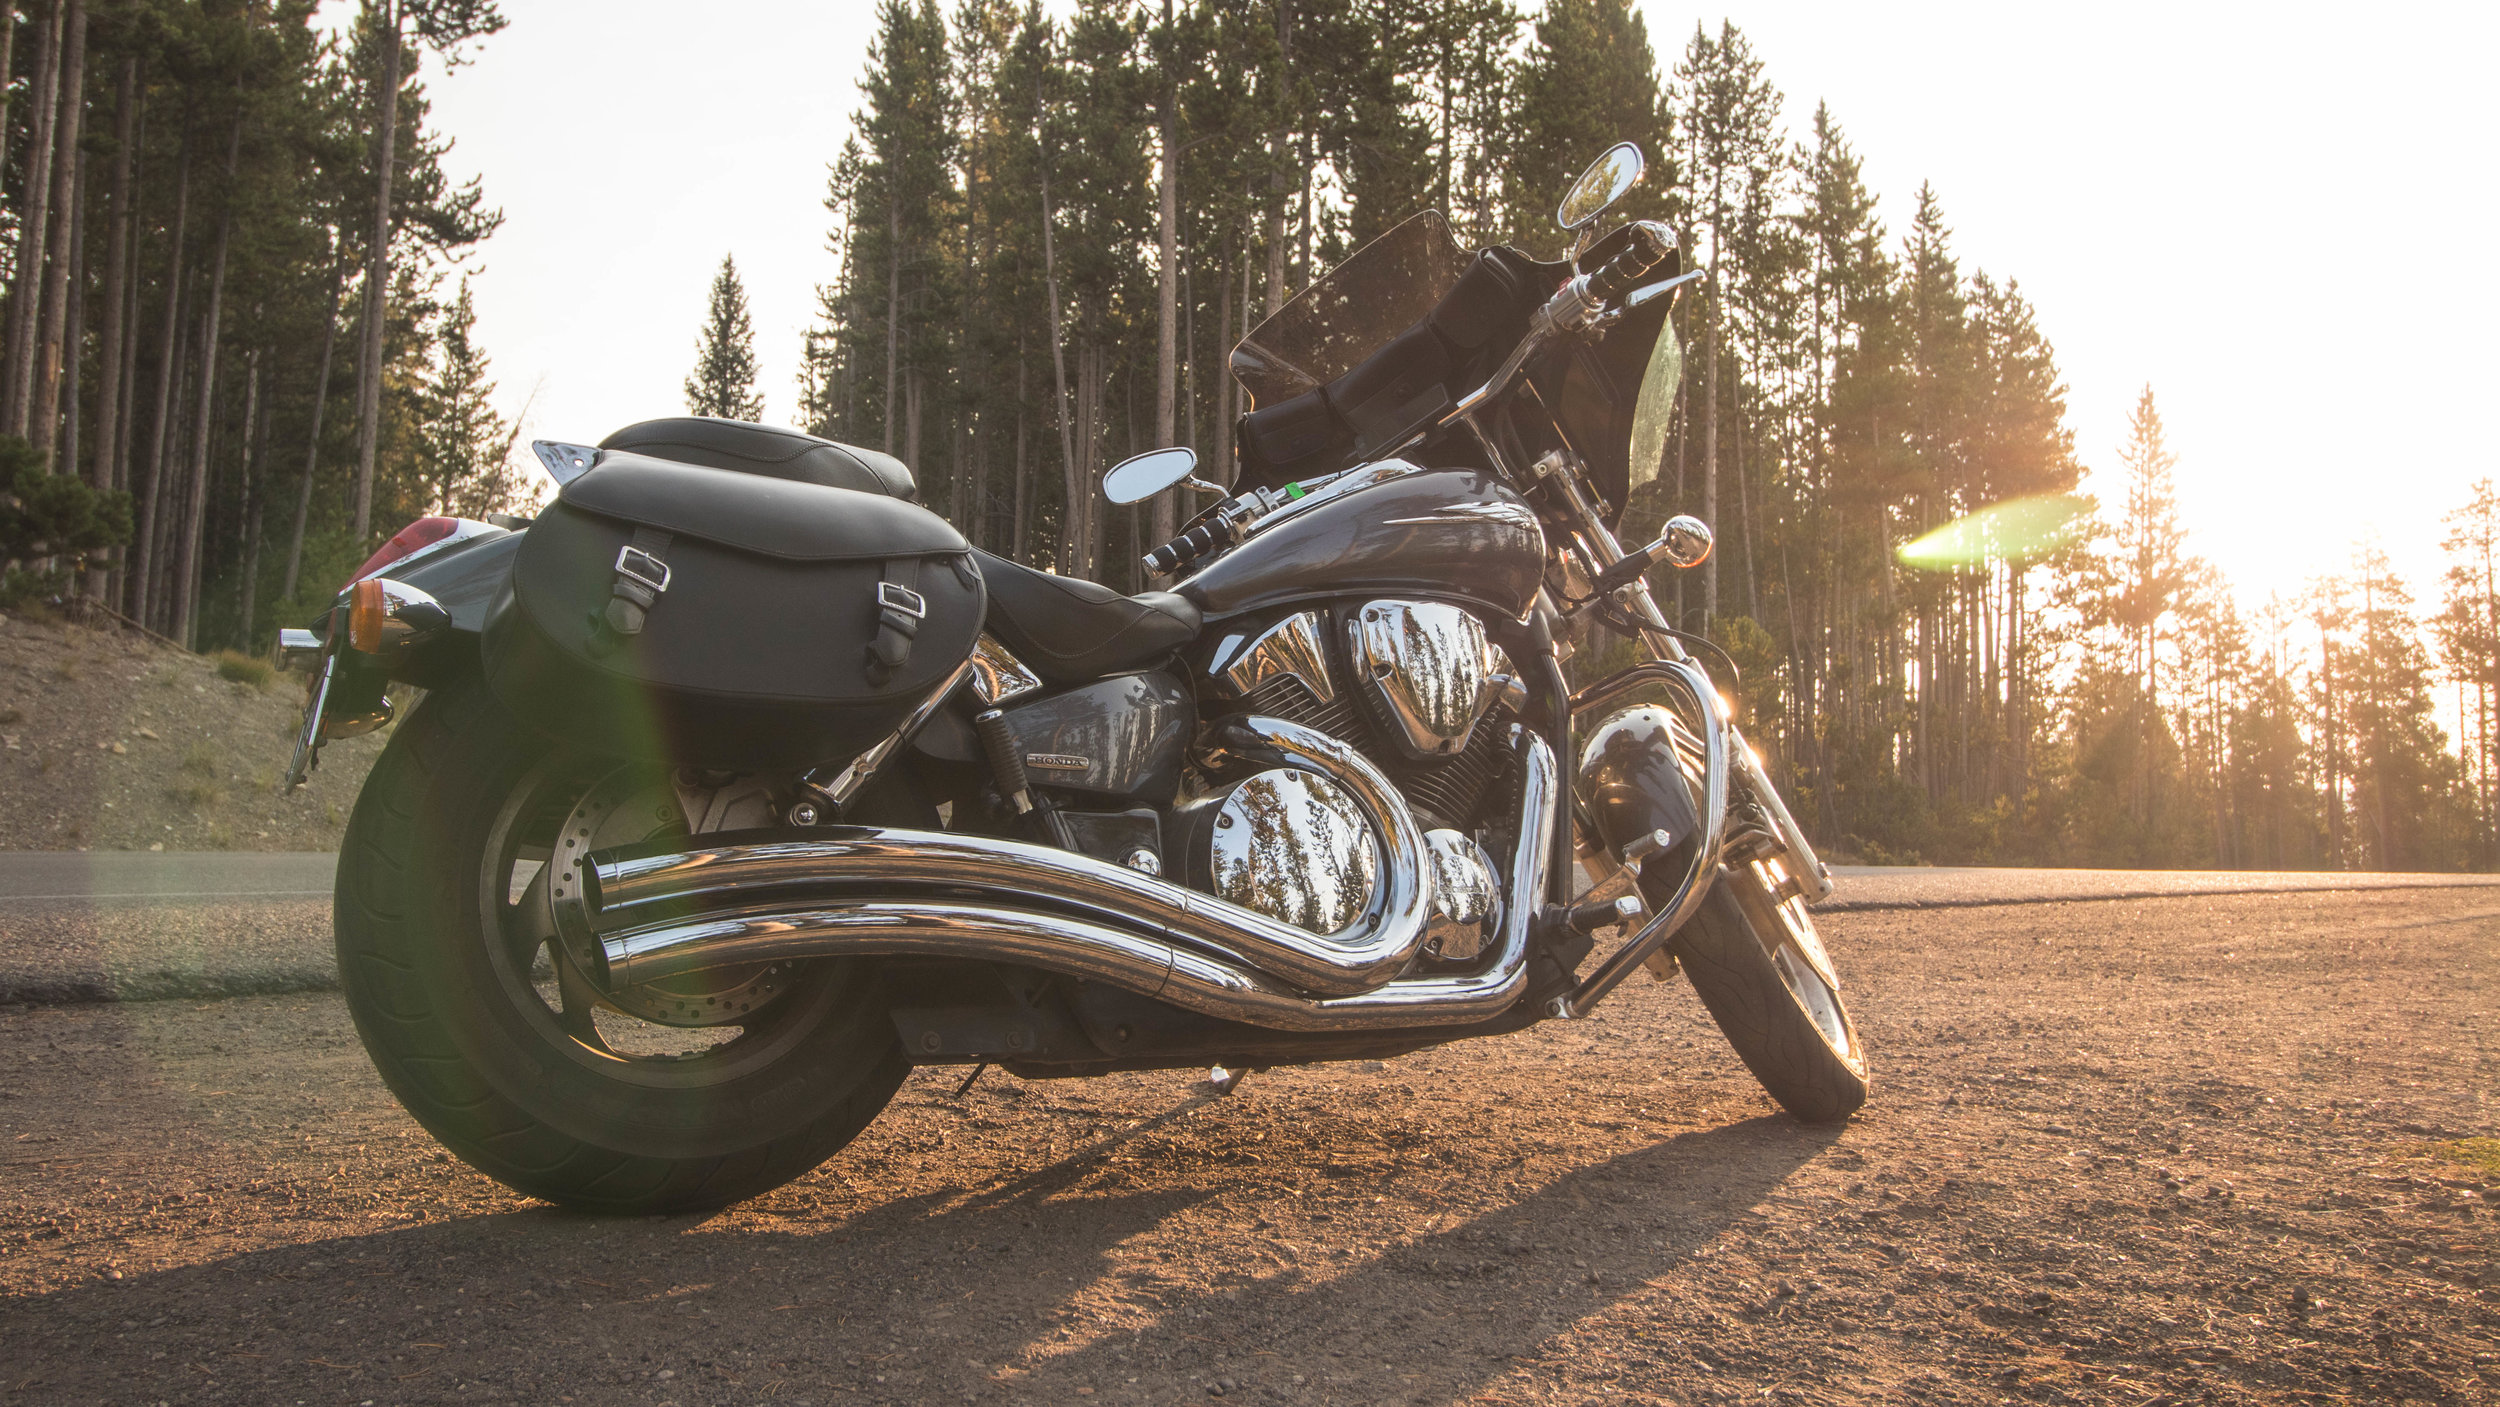
This is my favorite limitation! I know that sounds funny, but I love running into a roadblock where I have no choice but to figure out how it works. Whether I am working on my motorcycle, trying to figure out how someone did a transition in Premiere Pro, or learning a new riff on electric guitar, we live in the age of information. We seriously have all the information we need to do anything!
Here's a few resources I use to learn:
Youtube.... duh... Seriously. so. much. information. Sort through the junk and learn like crazy!
Skillshare - This is a great resource for creatives. There's a small fee, but you can usually find a code. I think I paid $50 for a whole year. I would recommend this website. There's lots of classes for specific skills. Invest a little and harvest much.
PremiumBeat - This is a great website for video and editing. Lots of great blog posts and links to free content. This blog may not be for you but there are several out there for your specific need. search google for what you need.
facebook - Believe it or not... Facebook has a great support of creative people who want to do more than share photos of their kids or silly memes. There's a million different groups on Facebook full of others who have the same passions as you. I am in a group called "Canon 80D." This group is devoted to people who have the same camera I do and they share what they are doing with it. These groups have a wealth of information, all you have to do is join the group that suits you and use Facebook to learn.
Pinterest - I use Pinterest for two things: 1. learning information about a specific topic or 2. find creative ideas to help me overcome limitations. This site originally was designed primarily for females, but it has changed. I suggest it for every creative!

Time
Time. Time is amazing. No matter what, I don't have enough time. I currently am unemployed and somehow STILL don't have enough time to do what I want to do. There is only one way to overcome the limitation of time: fit the big rocks in first. Have you ever seen the example of someone filling half a bottle full of sand, then stones, and then large rocks? The rocks never fit. BUT if you fit the big rocks in first, add the small stones in between, add sand in AND pour water in after the sand, you actually fit more in than before!
Figure out what your priorities are and get them on your schedule. If you really want to overcome the limitation of time, you have to prioritize what is important in your life. Once you get what's important in your schedule, everything else will fit in between.
At the end of every chapter, Malm adds a challenge. Here it is:
“Choose one project you’re working on. Then cut your resources for that project in half. Move your deadline closer. Cut the budget. Remove some technological resources. Create some limitations. Now think creatively. Look for unique ways to accomplish the same goal. Decide what’s really necessary for the project. You’ll find many of the resources were unnecessary for accomplishing your goal.”
At the end of the day, you can overcome any limitation if it means enough to you. In every area of our life we run into limitations and you have to choose what is most important to you.
What limitations have you ran into that I didn't discuss? How do you overcome them?

Maintaining Your Creativity
There is no doubt creativity drains. At least for me... and every other creative I have talked to. At some point in your creative life, you will run out of fuel and need to refill it. Over past few years I have noticed an intense drain on my creativity...
There is no doubt creativity drains. At least for me... and every other creative I have talked to. At some point in your creative life, you will run out of fuel and need to refill it. Over past few years I have noticed an intense drain on my creativity. I've had so much output: music, worship services, graphics, video, photography, the daily grind. When you realize it's hard to produce quality creativity or you have a hard time getting excited about your passion and skill, it's probably time to go into maintenance mode. Even though you are in maintenance mode, it doesn't mean you can't create, it means you have to be aware of your creativity capacity. Here's a few things I do to nurture my creativity.

1. sleep and rest
You know your body more than anyone. Make sure you are getting the sleep you need. I personally can run on about 6-7 hours of sleep every night without feeling drained. I know others who need 4, and others who need 8+. Find out what you need and make it a priority.
Resting is different than sleep. We live in a world without margins. We wake up and our feet hit the ground and off we go with not a minute to waste. You can be getting your preferred amount of sleep and still be creatively drained if you are not taking time to rest. Make sure you are building margins in your life to sit and reflect on what is happening around you and what God is trying to say to you.
It doesn't have to be extensive. Put the kids to bed and before you start working again, or put on the tv, or your list of chores to get done before bed, grab a chair and sit outside and listen to the birds sing. If you absolutely have no time to give, you need to re-evaluate your schedule and potentially your life. Margin is an important part of the creative process. It's an important part of living a healthy life regardless. If you have no margin, God can't use you the way He should be.

2. get away
One of the best things I can do to recharge is change the scenery. Whether you spend your time at home, in an office cubicle, or in a open workspace, looking at the same walls sucks the creativity out of you. Find a time to get away. For me, I find it most helpful to find some sort of moving water and plant a seat near it. Hearing the water move past me refuels my creativity for some reason. Find your happy spot. Figure out what works for you.
Also, when you are constantly in the same places, you can get in a creative rut. Try crafting your skill in a new location. Shoot photographs somewhere you never have been before, take your acoustic with you on vacation, unplug your MacBook from your monitor and sit on the deck. Sometimes it even helps to switch seats in the same room! If you can't take your workspace with you, improvise.
Some of my best photography is in new places. I love being able to try and capture that feeling I am feeling while I'm there in just one frame. It can be a challenge, but it's also a creativity boost. Don't confine yourself to 4 walls, it will kill your creativity.

3. Learn
Have you ever noticed all of your graphics use the same font... or maybe all of your paintings use the same colors, or all of your photographs have a similar technique, or maybe you are stuck using the same chord progressions?
One of the ways to break out of a creative rut is to learn what others are doing. I've been obsessed with Peter McKinnon lately. Besides being super A.D.D. which helps keep my attention through a 10 min. video (pathetic I know), he has a great way of sharing different techniques I can use in photography and video. This guy has so much experience!
Find someone who you can learn from on youtube, or skillshare, creative live, vimeo or whatever and go to town. We live in the digital age with so much knowledge at our fingertips. Crack into it, find a new technique and have at it. Trying something new always gets me excited about getting back out there and creating something new.
It doesn't have to be a video, sometimes you can find great information and transforming thoughts in books. A book that revolutionized my creative thinking and indirectly pushed me to move on from my most recent job is Pursing Christ. Creating Art. This book challenged my "status quo" perspective and pushed me to give my best to Jesus. I strongly suggest this book if you are struggling with your purpose or creativity.

4. relationships
Remember this equation: Relationships > Everything. Period. If you want to more creative you have to spend time with others. If you are ever in a drought, grab a buddy and find out how they are being creative, or better yet, ask them to help you with your project. I guarantee you if you work on collaborating with others, your creativity with thrive. If you struggle with collaboration, this is top priority to work on. Surrounding yourself with the right people, with other people, will boost your creativity to new levels.
Bottom line, we are all creatives. Just like in your car, if you let the fuel gauge get too low, you won't go anywhere. It's no different with your creativity. Remember to maintain your creativity and you will be a happier person!
What do you do to maintain your creativity that isn't on this list? Feel free to comment below.

Apps for Worship
This week I went to the Apple Store and bought a gigantic 12.9" iPad for Evident Church. I may have a problem. When I walk in the Apple Store, the employees recognize me! Needless to say, I am a huge fan of using technology to its fullest...
This week I went to the Apple Store and bought a gigantic 12.9" iPad for Evident Church. I may have a problem. When I walk in the Apple Store, the employees recognize me! Needless to say, I am a huge fan of using technology to its fullest when it comes to leading worship. When the iPad was first released, I was skeptical. I didn't see why I would need one if I had a computer and an iPhone. The advantage of having a tablet has been a game changer for me. The reason: developers have created apps for specific purposes of my life. Because of my iPad, I no longer have to carry additional books or chord charts along... and I have every single one with me!
Here's a few of the apps I use specifically for leading worship. Without these apps, life would be much more difficult!
OnSong - Chord Chart Management App

When I purchased this app several years ago it was only a few bucks. Now, it's closer to $20. Although it comes with a pretty hefty price tag, for me it's totally worth it. This app is essentially my chart book. It's able to handle chord pro style, or you can download pdfs right into it. I store all of my music charts and I'm able to create set lists each week. I play through the first song and swipe to the right and the next song is in order for me. If we need to change a key or add a capo, it's just a click away. No need to ever print out music again! I use a looptimus foot pedal connected with a USB cable to control my iPad through midi signals. This let's me control the iPad hands free. I can add sticky notes, rearrange charts and even sync the iPad with others on the stage. This app continues to improve and become more stable. I can't imagine trying to go back to sheet music.
Planning Center - Church Management Software

If you are living under a rock, planning center is a mega organization these days. More than just an app, this service allows you to schedule musicians and set lists, store content, check in your kids, send emails and much more. This app easily allows me to communicate with my team leaving notes for the service order and pretty much anything else I can think of. Most churches I work with these days use planning center. There is a subscription fee for the service but this app is free. This is the industry standard when it comes to church service organization.
YouVersion Bible App

You can't list apps to lead worship without mentioning a bible app. The YouVersion Bible app is a great tool with pretty much any version you like. You can take notes, highlight, find reading plans and more. Our church actually has a YouVersion event you can even follow along with the sermon notes. I love always having the Bible with me, no matter where I am. The best part, it's free! Everyone should have this app on their phone. Everyone.
Loop Community Prime MultiTracks App

For the past several years we have been using loops/tracks in worship with a click track (metronome). We've tried many different apps to run our loops and tracks, and have recently landed on using Loop Community's Prime App. The beauty of this app is the simplicity. We can store all of our loops in the app and when there's no loop, we can load just a click track. Ableton Live is our preference, but when it comes to simplicity, this app is hard to beat to run our loops. You can upload your own loops, or purchase loops from a community base online at loopcommunity.com. They usually have a free app of the month, so make sure to check that out!
GarageBand Music Creation app

Don't write this one off because it's a free app from Apple. This app is very powerful. Loaded with great sounds and loops, we've used this app live and for recording parts we need to add to our sound. We've even plugged the iPad into a midi controller and used this to run keyboard synths and pads. I've used this app with my looptimus pedal as well. This one is free, download it, play around and have fun with it. If you are going to use your app for live performance I suggest you get an interface that works with iOS devices and a USB cable adaptor. Someday I will discuss this in detail.
Novation LaunchPad Music Creation App
I use this one for a few things. This is an EDM style music creation app. There's a grid of squares and each grid is a different sample. you can play one square in each column making an unlimited amount of different sounds. I use this app to create backing tracks, music for worship videos, or just to hype up the atmosphere in the room. You can buy different packs and they have a few different ones. You can make your own pack by uploading new samples or combining samples from different packs. You can even play along with these samples if you can find some that aren't so hardcore. This is a fun app with lots of possibilities for music creation. You can also use this app to fire off loops you've created as well. They've had some great updates over the years making this a powerful app.
Polytune Guitar Tuner App

In a pinch, this app has saved me. I have a polytune tuner on my electric guitar pedal board and a Polytune clip in my acoustic case. As far as tuners, they don't get much better. On occasion, like in Guitar Center, and I am fighting a stubborn guitar, or just need to get the root E tuned in cause it's so messed up from some 12 year old playing it, I always have a guitar tuner with me. This is basically all this app does, but it does it well.
ProRemote ProPresenter Controller

If you use ProPresenter, you can leave your computer plugged in near the projector in a portable situation and control your presentation software from an app. I was leading worship up in Northern Michigan and this was the exact situation. The computer and projector were in the middle of the room and it was very annoying to have to wire the laptop across the room so we set the laptop on the projector crate and used this app to control the lyrics and fire off slides. Very useful. I would highly recommend this to anyone using ProPresenter in a portable situation.
Dropbox, & iBooks, Notes, Reminders Apple Apps

The beauty of an iPad is you always have your work and thoughts with you. Productivity apps are great tools to help you stay organized and keep you on track with what needs to get done. I use a mixture of Apple Notes, Reminders and email to stay on top of what needs to get done. Having a dropbox account lets me share and sync documents with others. All of my books are now digital, always with me. I lose the smell of the freshly printed pages, but having every book I read with me at all times, being able to search words or phrases in every book all at once, taking notes within the books... and then being able to search the notes, it amazes me enough to get over having to lug around a stack of books I need to read. Find a system that works for you an pump out work on your iPad. I have a mac and an iPhone and all of of devices are completely synced. It's a beautiful thing.
At the end of the day, are any of these apps necessary to live? Nope, but they make life easier for me, especially in worship. After using an iPad and these apps for years now, it would be hard to imagine doing ministry without them. It's not impossible, but I am blessed with the right tools to equip me to do my job the best I can.
What apps do you love??

Care: Acoustic Guitar
It seems a bunch of my friends currently are in the market for a new acoustic guitar. If you have spent any time at all with me, you know my love for Taylor Guitars. I know they are not for everyone, but...
It seems a bunch of my friends currently are in the market for a new acoustic guitar. If you have spent any time at all with me, you know my love for Taylor Guitars. I know they are not for everyone, but I personally feel Taylor puts money where they need to and although they are pretty expensive, it is a tool that will last you decades. Here's a few tips on how to get the best sound from your guitar and care for your acoustic, whether or not it's a beloved Taylor.
Tip #1 - Play your acoustic!
You may have noticed your guitar can sound different at times. Sometimes when you play it, you are amazed! Other times, the same guitar leaves you wishing for more. It's not your ears playing tricks on you, it's true, the guitar sounds different! One of the best things you can do for your acoustic guitar is play it! Wood is actually very responsive. When you don't play your guitar, it closes up and tightens. When you play it frequently, the sounds resonate and open up the wood, making the guitar sound brighter, deeper, and more full. I try and play my acoustic at LEAST 3 times per week. Lately, I've been making it a goal to play it every other day to keep it open. If it sits in it's case for a few months, it isn't ruined, but it will take awhile to open back up. Do your best to show some love to your acoustic.
Tip #2 - change your strings, when they need it
Strings can make or break the sound of your guitar. Whenever I feel like my guitar is sounding dull, or unresponsive, even though I have regularly been playing it, it usually is time for new strings. There isn't a certain time frame strings last. I've had some strings last over 6 months, even though I was putting in 40-50 hours/week on them. Other times, they don't last 2 weeks. You need to be the judge of when you need to change your strings. Usually if I break a string (unless it's the next gig after I change them), I will go ahead and swap the whole set out instead of just the one that broke.
Most manufactures will indicate on their website what the original strings were installed on your guitar. Most of the time, those are going to be the best strings for your guitar. They spend a lot of time and money finding what strings sound best so make sure to take their advice. BUT, changing the strings on the guitar will help you shape the sound of your guitar, making it your own. If you would like more bass, try a thicker gauge string. If you want it to sound brighter, maybe switch from a bronze to 80/20 mix. I am a big fan of Elixir strings, which fortunately is what my guitar originally came with. For me, the coated strings last longer, sound better, and feel better. Here's a video on the best way to change your strings.
Tip #3 - use a humidifier
I haven't always used a humidifier in my acoustic guitars. When I got my first acoustic, I didn't... and it has lots of cracks. It looks really cool, but I wouldn't wish a giant crack down the top of a guitar on anyone. A humidifier will help keep your guitar from cracking, but will also help your guitar sound better. When it has the proper moisture it is able to breathe the way it needs to. I use the Oasis Guitar Humidifier. $20 on amazon and I fill it with water when it shrinks. The best part of this humidifier is it will humidify the guitar even if it isn't stored in it's case. In my office, my guitar is hanging on the wall. It's still working even though it's out of the case. Also, it will never touch the wood. Some humidifiers have bags in which you put crystals. The bags end up leaning on the wood, which can cause rubbing, or uneven humidity. Just buy the Oasis once a year and be done with it.
Also, make sure to have a way to read your humidity in your case! I recently purchased the TaylorSense monitor which updates on my iPhone. Yep, there's an app for that...
Tip #4 - Plug it in
So you just got your new guitar and you want to test out it's electronics! Good! First of all, always keep a few extra batteries on hand. I've found duracell batteries work the best with my guitar. Don't assume every 9V battery will work... I tried to use a cheap one and it didn't fit!
Also, spend money on a decent direct box. A direct box converts the signal from unbalanced to balanced. You need one. Don't just get a cable that goes from 1/4" to XLR and plug into a mic line. You just spend $2000 on a legit guitar, don't skimp and bottleneck your beautiful guitar's sound with a cheap direct box or cable. I highly recommend the Radial Stage Bug SB-2. There is a difference between direct boxes. Some cause noise, or weird phasing issues. I've never had trouble with the stage bugs. This one in particular is labeled for bass & keyboards, but I prefer it over the stage bug labels for acoustics. If you want to spend even more money, you can upgrade to the industry leading Radial JDI.
If you want to get creative, you can use some guitar pedals to color your sound. I've used preamps, reverbs, compressors, and delays on my acoustics. Right now, I am currently running straight into the board. You can get as creative as you want with your sound. (Pro Tip: Chorus pedals on acoustic guitars were a hit in the 90s & early 2000's. Today, reverb is the iconic sound. Stay away from chorus on your acoustic unless you are going for a retro sound.)
Tip #5 - Find some friends
One of the best things you can do to improve the sound of your guitar is find people you can spend time with and learn from. You can practice by yourself all day long, but when you spend time with others, you become a better musician. If you don't have a network of musicians, you can't expect to grow. I've been on staff at Evident Church for the past 5 years and I view these people as my family. When I am making music with a group of people, there's a special connection, unexplainable. These people help me grow as a musician, a Christian and as a human. They will always have a special place in my heart.
Your music you create is more than just for you. Share it with the world! Music is powerful.
“Where words fail, music speaks.
- Hans Christian Andersen”
What are some ways you have found help take care of your acoustic? Feel free to comment below!

5 BOOKS FOR CREATIVES
Reading is a HUGE must for the creative. Here's 5 books you should be reading to help your creativity...
READING
Reading is a HUGE must for the creative. Here's 5 books you should be reading to help your creativity:
1. BIBLE
DUH! We should all be reading the Bible, Right?! As much as that's true, it doesn't always happen. As creative artists, we must make reading our Bible a daily priority. here's a few reasons why:
- Input/output - What we input is what we will output. If we want to produce healthy output, what better input can we take in than the Bible?! Just remember:
What you say flows from what is in your heart. (Luke 6:45nlt)
- Examples of excellent creativity - There's so much creative content stuffed in the Bible. The whole book of Psalms is just a bunch of poems, that have lasted for thousands of years! When I feel stuck, a great place for me to look for solid content to help my creativity flow is the Bible!
- It's always with me - If you haven't already, download the YouVersion Bible App. What an amazing tool! You can highlight, share, save, make images, there's even an iMessage app. This is a huge tool for me I use throughout my day.

2. Pursuing Christ. Creating Art.
Besides the Bible, this has been the book that has the greatest impact on my life and creativity in the past several years! If you haven't already, I highly recommend it! No, it will not give you tips on how to create more or better, it will help you understand how your creativity works and the purpose of it.

3. The purpose of man
Understanding our purpose will help us in our creativity. Tozer does a great job helping us understand the purpose of why we are here and what we should do about it!

4. Make your idea matter
Story is king. This isn't a fad. Story is king. If you want people to remember your idea, you have to give them a reason to remember. Read this book. Especially if you have your own business.

5. Creativitiy inc.
Speaking of story, this entire book is on the story of Pixar. Just to warn you, this is a book you will have trouble putting down until it's finished! The stores will keep you captivated all the way through with little nuggets of truth to apply to your life. Get it! It's worth it.

Bonus How to be creative: 5 steps to boost your creativity
This is a simple, fast read. Lots of great reminders sprinkled in this little book. These 5 Steps, although simple, are powerful. Check it out. Currently the digital version is free on Amazon!

If you want to be creative, you have got to investing in yourself and your mind. I found myself constantly pouring out and never having any input and I had nothing left.
What books have you read to help fuel your creativity?